Sometimes you get an error message saying Audio Renderer error: Please Restart the computer while playing a YouTube video? If you are getting so then here are the possible workarounds that you can try to fix this error. Many Windows users have reported that they are getting an error message while playing a Youtube video.
An error message which says “Audio Renderer error: Please Restart the computer” viewing on the screen while accessing YouTube. Moreover, this error isn’t seen only on particular web browsers or a particular Windows version but it is seen on every web browser including Mozilla Firefox, Opera, Google Chrome, and Edge.
The causes because of this error message is been noticed. It occurs due to the Audio Driver glitches, bugs in BIOS version, conflicting Sound drivers, and many more. So, if you are encountering audio renderer error then this article may help you. Mentioned below are the best tips to fix the same issue.
1. Restart Your Computer
The very first thing, the error message suggests; please restart your computer, similarly restarting your computer can fix the issue. Even though, many individuals have reported that this tip can only temporarily fix the issue. And, doesn’t work as for long period. So, initially, in order to resolve this issue temporarily, you can try this method. And, just in case if you are searching for a permanent solution then move to the next method.
2. Run the Audio Troubleshooter
This is another potential tip to solve audio renderer error: please restart the computer is to run windows, built-in Audio troubleshooter. This in-built functionality equipped with a lot of strategies which will help you to fix numerous audio or other sorts of problems. And, effectively, if the error is occurred because of the general issue which Microsoft is familiar with then, running the Audio Troubleshooter could fix this issue. Here is how to do it!
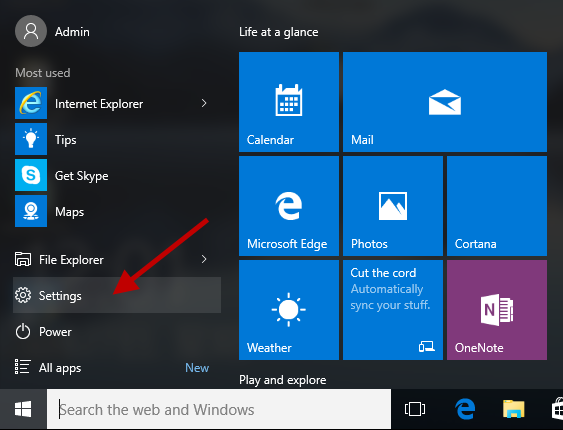
Step 1:- Go to start, then search for the Settings.
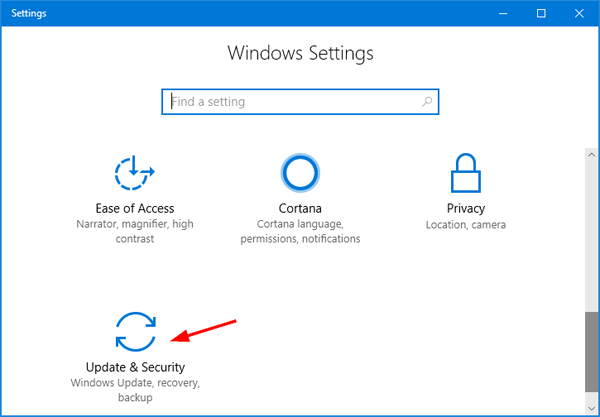
Step 2:- After this, once you will trigger the Windows Settings then go look for Update & Security and click on it.
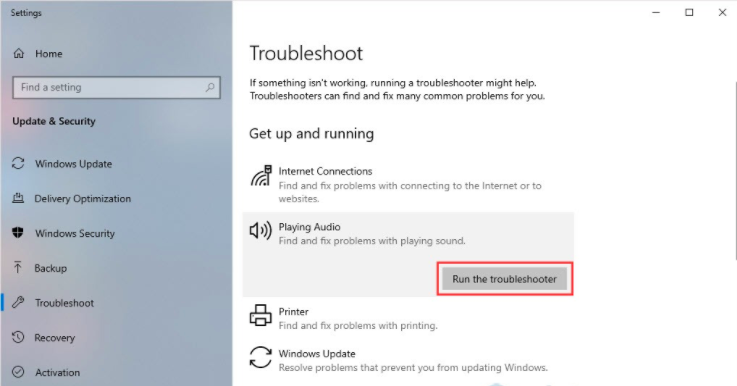
Step 3:- Now, from the left pane side, choose Troubleshoot from the list.
Step 4:- Then click on the Playing Audio option and then, select Run the Troubleshooter.
After the process is completed. You can start your system again and check whether the issue still persists or not.
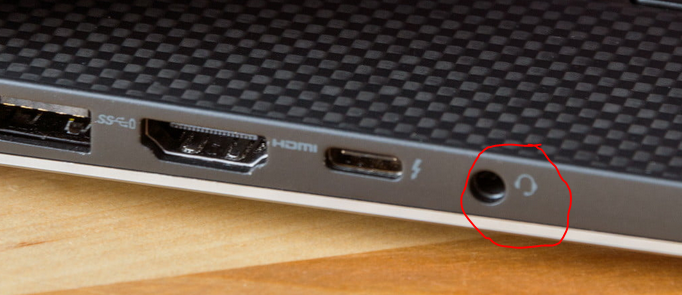
3. Plug or Unplug Headphones
Maybe, this method sounds a little bit silly. But, this will surely help you to fix the audio renderer error. Because many affected individuals have reported that this issue was fixed when they unplugged the headphones and plugged them in again. Moreover, this is comparable with both headphone jacks and USB cable. Therefore, simply unplug your headphones and plug-in again in order to fix the audio renderer error on YouTube. But, also keep in mind that this fix is a temporary approach, so if you are looking for a more lasting tip then try the next advanced solutions.
4. Restart Audio Device
Restarting the audio device is another great solution that can fix the audio renderer error: please restart the computer error while playing a YouTube video. To do that follow the below-listed steps!
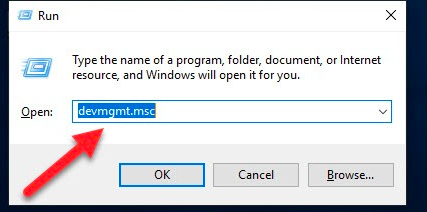
Step 1:- Trigger the Run Dialog box, quickly do it by hitting the Win logo + R key from the Keyboard and then type devmgmt.msc and click enter key from the Keyboard.
Step 2:- This will trigger the Device Manager Window. In this pop-up window, go to the audio inputs and outputs option and expand it.
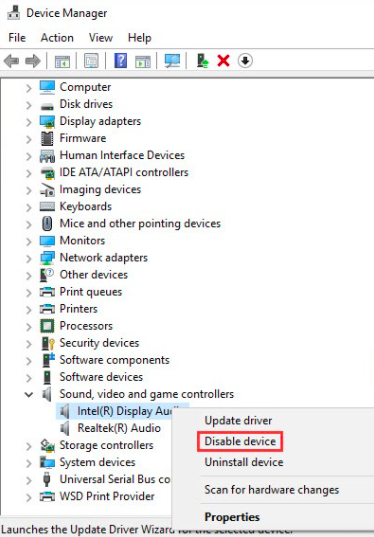
Step 3:- After that, detect the right driver of your audio device. Then, click right on it and select the Disable device option from the list that appeared.
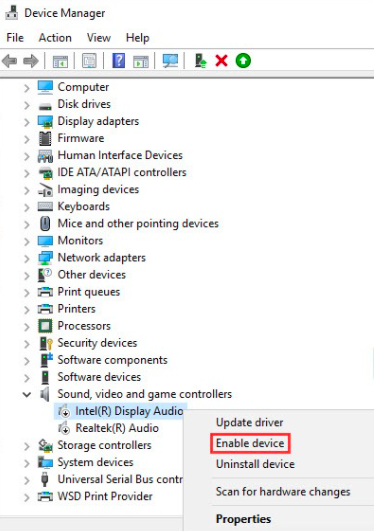
Once you affirmed the changes, then again tap on that device and select the Enable device option from the list to turn on the audio device again. Hope this method surely works and fixes the audio renderer error.
5. Turn Off Hardware Acceleration
Turning off hardware acceleration can also fix the audio renderer error. Sometimes, the issue is caused by this if you are using Google Chrome and Mozilla Firefox web browsers. So, it will take some moments to turn off hardware acceleration but possibly resolve this annoying issue that takes place while playing video on YouTube.
6. Roll Back Audio Driver
If you have lately installed or updated the new versions of your sound driver then an audio renderer error may take place. So, if you want to fix this issue, you can roll back or uninstall the driver. Rolling back to the previous driver version can heal this issue. So, here are the steps that explains you to how to do it!
Step 1:- In the search box of your Windows, type Device Manager and choose the best match from the appeared search result.
Step 2:- Then, locate the sound, video and game controller’s category and expand it.
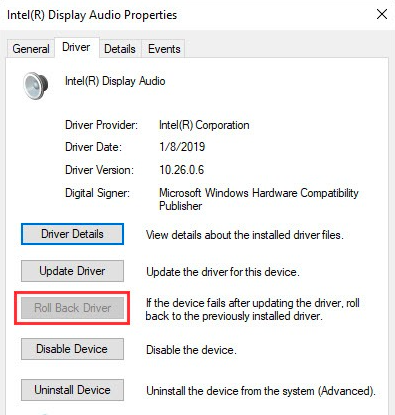
Step 3:- Next, click double on your Audio adapter. This will open the properties window of your audio adapter.
Step 4:- Inside it, head to the Driver tab and then tap on the Roll Back Driver option.
Conclusion
Above are the methods to solve your audio renderer error. You don’t have to follow all the steps just try one by one until you find the perfect one which will fix your error successfully. Hope this article is helpful for you and solves your entire problem.